Planting a hedge: the essentials
Start by clearing grass and weeds from the planting strip, then use a taut string to mark the hedge line. Dig a trench or individual holes wide enough for the roots, keeping the root flare at soil level. Set the plants at the recommended spacing, backfill carefully and water thoroughly. Bare root plants need their roots spread out, rootball plants need the soil around their roots protected, and pot-grown plants must be removed from their containers before planting.
A few details make a considerable difference to establishment. Keep bare roots damp while working, loosen circling roots on pot-grown plants and avoid burying stems too deeply. The planting instructions below cover these points, along with seasonal timing, laurel hedge spacing and watering during the first two growing seasons.
When to plant a hedge
The best months for planting hedges are typically October to April, when the soil is moist and temperatures are mild. This gives roots time to settle before the demands of summer. Potted plants can go in at any time of year provided you keep them watered, but avoid frozen or waterlogged ground.
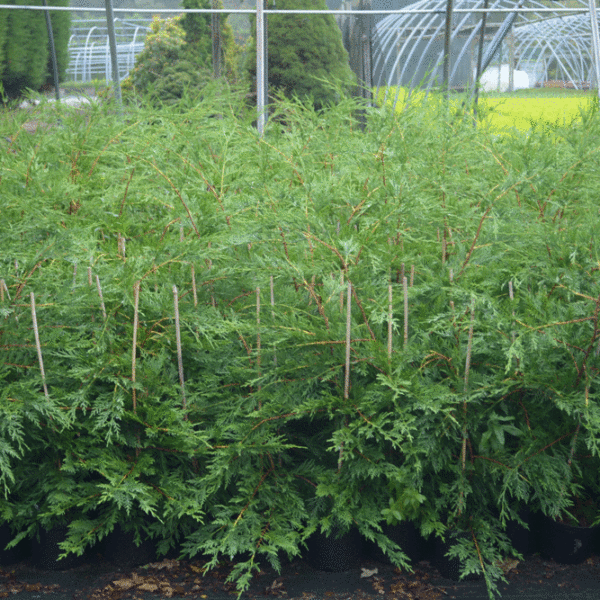
Bare root hedging is only available during the dormant season, roughly November to March. Plant it as soon as possible after delivery, keeping the roots covered and damp until they go into the ground. Rootball plants, such as larger yew, are usually lifted in autumn or spring and should be treated in a similar way.
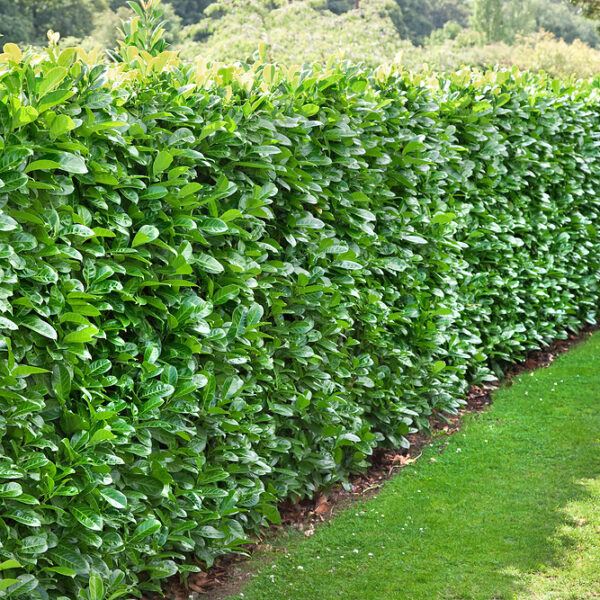
If you are wondering when to plant a laurel hedge, pot-grown cherry laurel or Portuguese laurel can be planted year-round, but an autumn or early spring start reduces watering pressure. Summer planting is possible with diligent irrigation.
| Root type | Planting window | Key points |
|---|---|---|
| Bare root | November to March (dormant season) | Plant promptly, keep roots moist, not for frozen or waterlogged soil |
| Rootball | Autumn or early spring | Handle by the rootball, keep hessian intact until in the hole |
| Pot grown | Any time, best in autumn or spring | Water before removing pot, extra care in summer |
Marking out and ground preparation
Before you order plants, measure the boundary and mark the line where the stems will sit. Use a string line between two canes for a straight run, checking it from both ends. Allow enough room for the mature width of the hedge; a young plant looks small, but branches will soon fill the space.
Clear grass and weeds from a strip at least 60cm wide. Dig over the soil along the whole length, breaking up compaction and removing rubble, large stones and perennial weed roots. This continuous preparation makes it easier to adjust spacing and keep the row straight.
If puddles remain long after rain, check the drainage before planting. On heavy clay, loosen compaction across a broad area and incorporate suitable organic matter into the upper soil where appropriate. Small amounts of grit in a narrow trench rarely solve drainage problems. Avoid digging a deep planting slot that collects water around the roots.
Cherry and Portuguese laurel both need soil that drains freely enough to prevent roots sitting in water through winter. Bare root hedging also benefits from a well-loosened planting strip, particularly where previous grass growth or foot traffic has compacted the ground.
Spacing and how many plants you need
Spacing depends on the species, the size of plant you start with and the style of hedge you want. As a general rule, smaller plants can be set closer together, while vigorous evergreens need more room. Check the recommended spacing for your chosen hedge before you order.
To work out quantities for a single row, divide the length of the hedge in metres by the spacing in metres. For example, at 50cm spacing (0.5m), a 10m run needs 20 plants. A double staggered row uses roughly twice the number, with the rows offset to create a denser screen.
Stand the plants along the prepared line before you dig. This lets you check the look from different angles and make small adjustments at corners or curves.
| Hedge type (example) | Starting size | Single row spacing | Plants for 5m | Plants for 10m | Plants for 20m |
|---|---|---|---|---|---|
| Cherry laurel | 40-60cm 9cm pot | 3 per metre (33cm) | 15 | 30 | 60 |
| Cherry laurel | 60-90cm 2 litre pot | 2 per metre (50cm) | 10 | 20 | 40 |
| Portuguese laurel | 40-60cm 9cm pot | 3 per metre (33cm) | 15 | 30 | 60 |
| Portuguese laurel | 60-90cm 2 litre pot | 2 per metre (50cm) | 10 | 20 | 40 |
| English yew | 40-60cm bare root | 3 per metre (33cm) | 15 | 30 | 60 |
| Green beech | 90-120cm | 3 per metre (33cm) | 15 | 30 | 60 |
| Privet | 40-60cm bare root | 4 per metre (25cm) | 20 | 40 | 80 |
How to plant a hedge: step by step
Follow the steps in order, keeping plants shaded and their roots moist while you work. Have water ready before removing plants from their packaging, especially on a dry or windy day. The handling instructions differ slightly for each root type.
1. Water pot-grown plants thoroughly before you start. For bare root plants, soak the roots in a bucket of water for an hour or two, but no longer than overnight.
2. Dig a trench or individual holes along the marked line. Make the trench wide enough to spread the roots without bending or cramping them. Depth is critical: the aim is to set the plant so the root flare (where the first main roots leave the stem) sits at the surrounding soil level. Planting too deep is a common cause of failure.
3. For bare root hedging, spread the roots out naturally in the hole. Trim any damaged or excessively long roots with clean secateurs. Hold the plant upright and gradually backfill, shaking it gently so soil falls between the roots. Firm the soil with your hands as you go.
4. For rootball plants, keep the hessian or wire cage intact while positioning the rootball. Once the plant is at the correct depth, loosen the hessian from around the stem and fold it back, or cut away wire after the rootball is stable. Do not lift by the stem; support the rootball from underneath.
5. For pot-grown plants, remove the plastic pot. If roots are circling the compost, gently tease them out so they grow into the surrounding soil. Place the rootball in the hole and check the level.
6. Backfill with the soil you removed. Firm it gently with your heel or hands to remove large air pockets, but do not compact it into a hard mass. Water thoroughly, even if rain is forecast. This settles the soil around the roots.
7. Check the planting level again after watering and adjust if the plant has sunk. Apply a 5 to 8cm layer of organic mulch, such as bark chips or leaf mould, over the rooting area, keeping it a few centimetres clear of the stems to prevent rot.
- Use a string line for a straight run and check the line from both ends.
- Remove plastic pots before planting.
- Support heavy rootballs from underneath rather than lifting by the stem.
- Keep each plant upright while backfilling and firming.
- Water thoroughly after planting, even in damp weather.
How to plant a laurel hedge
Laurel hedges (cherry laurel and Portuguese laurel) are vigorous evergreens that establish quickly when planted correctly. The steps above apply, but a few details are worth extra attention.
Pot-grown cherry and Portuguese laurel can be planted throughout the year when the ground is workable, with October to April generally giving the easiest establishment conditions. During summer dry spells, check moisture around the rootball and water deeply, often twice a week in the first growing season. Increase or reduce watering according to the soil and weather.
How deep should you plant a laurel hedge? Set the rootball so the top of the compost is level with the surrounding soil. Burying the stem, even by a few centimetres, can lead to collar rot. If you are planting on a slope, make sure the uphill side of the hole does not funnel water against the stem.
Space cherry laurel at 2 to 3 plants per metre depending on the starting size and how quickly you want a dense screen. Portuguese laurel, which is slightly slower and more upright, is often planted at 2 per metre. A double staggered row gives a thicker hedge faster.
After planting, mulch with bark or compost and keep the area weed-free. Laurel roots are shallow and compete poorly with grass in the first year.
How to plant bare root hedging
Bare root plants are lifted from the field during the dormant season and arrive without soil around the roots. They are lighter and cheaper than potted stock, but they need prompt handling.
Keep the roots covered and damp from the moment you unwrap them. A plastic bag or damp sacking works well. If you cannot plant immediately, heel the plants into a temporary trench of moist soil or compost, covering the roots completely.
When you are ready to plant, trim any damaged roots and spread them out in a wide, shallow hole. The planting depth is the same as for potted plants: the root flare at soil level. Backfill carefully, firming in layers, and water generously. A dusting of mycorrhizal fungi such as RHS Rootgrow on the roots can help establishment.
- Plant bare root hedging between November and March.
- Soak roots for an hour or two before planting.
- Dig a hole wide enough to spread the roots naturally.
- Set the root flare at soil level, never deeper.
- Firm gently and water thoroughly.
Watering and care after planting
New hedges need consistent moisture while the roots grow into the surrounding soil. Check the soil around the original rootball regularly during the first two growing seasons. A light shower may dampen the surface while the root zone stays dry.
Water deeply once or twice a week in dry weather rather than giving a daily sprinkle. A thorough soak encourages roots to grow downwards. Keep the mulch topped up to conserve moisture and suppress weeds, but leave a gap around each stem.
After planting, spread organic mulch over the soil along the hedge line, rather than placing a thick layer at the bottom of each planting hole. Bark chips, leaf mould or well-rotted compost help reduce evaporation and discourage weeds. Keep the mulch clear of the stems, and leave the original soil beneath each rootball firm enough to prevent the plants sinking.
Begin shaping the sides of suitable hedges while they are young to encourage branching near the base. Avoid cutting Leylandii into old brown wood, and follow species-specific advice for flowering shrubs and slower-growing yew. If growth is weak or the soil lacks nutrients, apply a balanced fertiliser at the recommended rate in spring of the second year.
Month-by-month planting calendar
This calendar shows the best months for planting different root types. Conditions in your garden and the weather each year will influence the exact timing.
| Month | Bare root | Rootball | Pot grown |
|---|---|---|---|
| January | Yes, if ground not frozen | Yes, if ground not frozen | Yes, if ground not frozen |
| February | Yes | Yes | Yes |
| March | Yes (early March) | Yes | Yes |
| April | No | Limited | Yes |
| May | No | No | Yes, extra watering |
| June | No | No | Yes, extra watering |
| July | No | No | Yes, extra watering |
| August | No | No | Yes, extra watering |
| September | No | Limited | Yes |
| October | Yes (from late October) | Yes | Yes |
| November | Yes | Yes | Yes |
| December | Yes, if ground not frozen | Yes, if ground not frozen | Yes, if ground not frozen |
Common questions
What month is best to plant hedges?
October to April is generally the best window, when soil is moist and temperatures are moderate. Bare root hedging must go in between November and March. Potted plants can be planted in any month, but avoid frozen or waterlogged ground. Summer planting is possible with extra watering.
What do you put at the bottom of a hedge?
Spread a 5 to 8cm layer of organic mulch, such as bark chips, leaf mould or well-rotted compost, over the soil beneath a new hedge. Keep the mulch a few centimetres away from the stems to prevent rot. This conserves moisture, suppresses weeds and gradually improves the soil.
How do I plant hedges?
Clear a continuous strip, mark a string line, then dig a trench or holes to the correct depth so the root flare sits at soil level. Space plants according to species, backfill firmly and water thoroughly. Handle bare root, rootball and pot-grown stock as described in the step-by-step guide above.
When to plant a laurel hedge?
Pot-grown cherry laurel and Portuguese laurel can be planted at any time of year, but the ideal period is October to April. Planting in autumn or early spring reduces the need for summer watering. If you plant in summer, water deeply twice a week during dry spells for the first season.
How deep should you plant a laurel hedge?
Set the rootball so the top of the compost is level with the surrounding soil. The root flare, where the first main roots leave the stem, should be visible at the surface. Planting too deep can cause collar rot, particularly on heavy or poorly drained ground.
Can I plant potted hedging in winter?
Yes, when the soil is workable and neither frozen nor waterlogged. Choose the day for the ground conditions rather than the calendar alone. Potted plants are more forgiving than bare root stock, but the roots still need good contact with unfrozen soil to establish.
Should I add fertiliser to every planting hole?
Routine fertiliser in the planting hole is not needed and can damage new roots. Focus on thorough soil preparation, correct depth and consistent watering. A mycorrhizal product such as RHS Rootgrow can be applied to the roots at planting time to aid establishment.
How soon will the plants join together?
That depends on the species, starting size, spacing, site and aftercare. Vigorous evergreens like cherry laurel may start to knit within two to three growing seasons when planted at close spacing. Slower species such as yew take longer. Good soil preparation and watering speed the process.