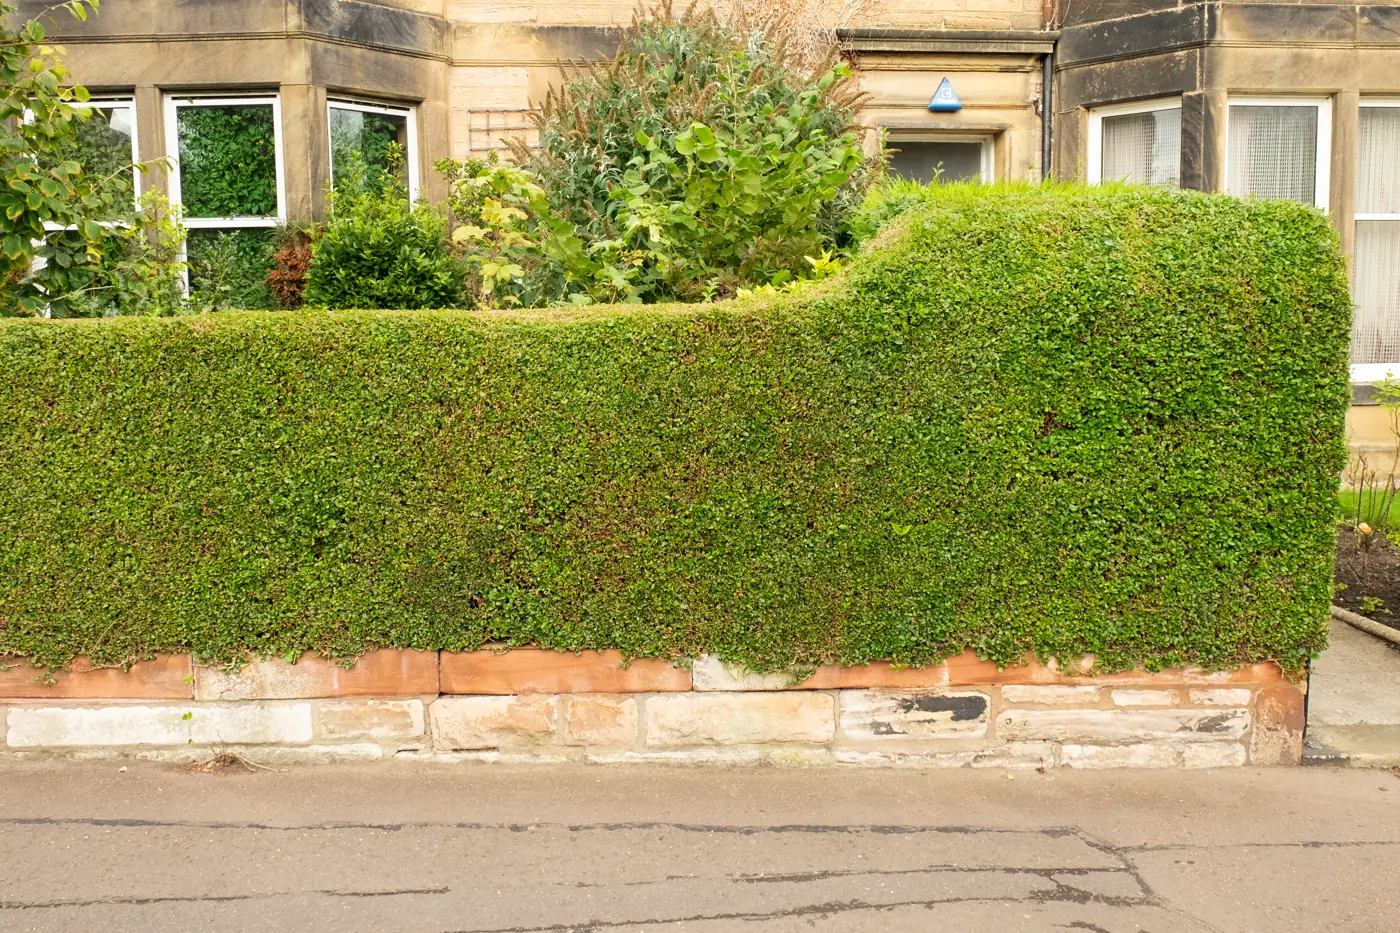
What is privet? Identification and the two main types for UK gardens
When gardeners talk about privet, they usually mean garden privet, Ligustrum ovalifolium. This is the classic hedging privet with oval, glossy, dark green leaves that stay on the plant in most winters, only dropping in the coldest spells. It produces small white flower panicles in summer, followed by shiny black berries in autumn. The flowers have a strong, sweet scent that some people love and others find cloying.
Wild privet, Ligustrum vulgare, is native to Britain and grows naturally in hedgerows, woodland edges and chalky areas. Its leaves are generally narrower than those of garden privet. It is often deciduous, although plants in sheltered positions may retain some foliage during mild winters. The small, creamy-white summer flowers attract pollinating insects, while the black berries provide food for birds. Wild privet suits informal native hedges, particularly where wildlife is a priority. For a regularly clipped boundary that holds more of its foliage through winter, garden privet is generally the better choice.
California privet is a name commonly used in the nursery trade for Ligustrum ovalifolium, the familiar garden privet. It has the same oval leaves, upright growth and tolerance of regular clipping. The name does not establish that a plant is more frost-resistant or better at retaining its leaves than other garden privet. Winter leaf retention depends largely on temperature, exposure and growing conditions. When comparing plants labelled garden privet or California privet, check the botanical name rather than assuming they are different hedging varieties.
- Garden privet (Ligustrum ovalifolium): semi-evergreen, oval leaves, the standard hedge privet
- Wild privet (Ligustrum vulgare): native, deciduous, narrower leaves, excellent for wildlife
- California privet: a form of L. ovalifolium, often sold as a hardier variant
Is privet a good hedge? Benefits and drawbacks
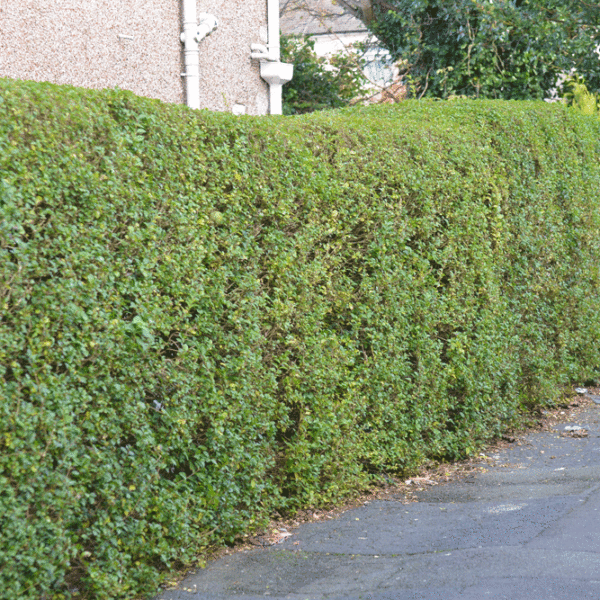
Walk along an established residential street in Britain and there is a good chance you will see privet neatly clipped beside a path or front garden. It earns its place through steady growth, close branching and an ability to recover from repeated pruning. Once established, a privet hedge can provide useful screening, catch some airborne dust and soften the appearance of a roadside boundary. Its small leaves also make it easy to maintain a clean, straight outline. Privet tolerates clay, sandy soils and partial shade, provided the ground drains reasonably well. Growth is usually thickest in good light, with more open branching where buildings or mature trees cast heavy shade.
There are downsides, though. Privet is not fully evergreen, so in a severe winter you may be left with a bare brown framework until April. It needs frequent trimming, two or three times between May and August, to stay neat. If you let it flower, the scent can be overpowering, and the pollen may irritate hay fever sufferers. The black berries and leaves are mildly poisonous to humans and pets, so it is not ideal next to a children’s play area or a dog run. Finally, privet has shallow, thirsty roots that can dry out the soil for a metre or more around the hedge, making it hard to grow other plants close by.
- Fast growth: around 30 cm per year once established
- Thrives in sun, part shade and most soils, including clay
- Tolerates urban pollution and coastal wind
- Needs trimming two or three times a year to stay dense
- Semi-evergreen: can look bare in hard winters
- Berries and leaves are mildly poisonous to people and pets
Where and how to grow a privet hedge
Privet is remarkably unfussy, but it does best in a spot that is not waterlogged. Full sun will give the densest growth, but it will still make a respectable hedge in partial shade, such as along a north-facing fence or under the dappled canopy of a street tree. Avoid deep, dry shade right against a house wall, where growth will be thin and leggy.
Soil preparation is simple. Clear the planting line of weeds, especially perennial weeds like couch grass and bindweed. If your soil is very heavy clay, fork in some well-rotted organic matter or compost to open it up. On very sandy soil, organic matter helps hold moisture. Privet is not fussy about pH, growing happily on chalk, acid sand or neutral loam.
- Sun or part shade; avoid deep dry shade
- Any well-drained soil; tolerates clay, sand and chalk
- Clear weeds thoroughly before planting
- Improve very heavy or very sandy soil with organic matter
Shop the plants in this guide
Our privet hedging range includes bare root plants in two handy sizes, ready for planting between November and March. Choose 40-60 cm plants for a budget-friendly long run, or 60-90 cm plants for a quicker, taller start.
How to plant a privet hedge step by step
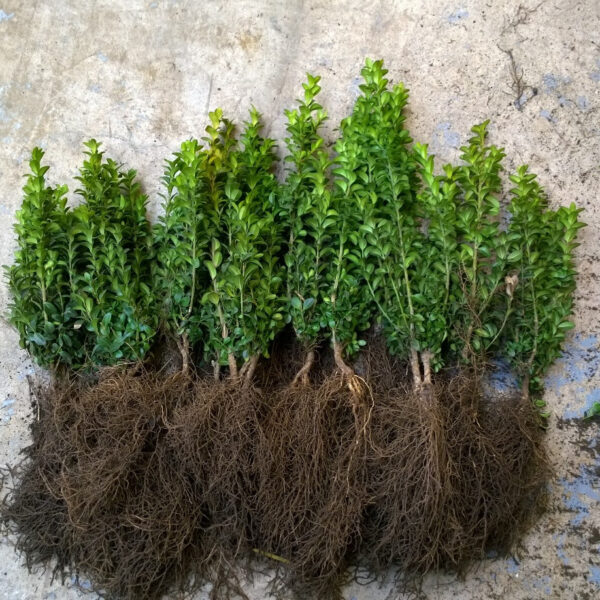
Good soil preparation and consistent watering during the first growing season give a new privet hedge the strongest start. Bare root privet hedge plants are normally planted between November and March, while the plants are dormant and the ground is neither frozen nor waterlogged. They are particularly practical for long boundaries because several plants can be handled and positioned without heavy pots. Garden Hedges supplies bare root privet in 40-60 cm and 60-90 cm sizes, allowing you to choose between smaller plants for a longer run and taller plants for more initial height. Keep the roots protected from drying winds while planting, and water thoroughly once the trench has been filled.
The steps below work for common privet, wild privet and California privet. If you are planting a mixed native hedge, wild privet can be planted at the same spacing and depth as the other species.
- Mark the line of the hedge with a string line. For a straight hedge, use two canes and tight string.
- Dig a trench, not individual holes. The trench should be about 30 cm wide and 30 cm deep for bare root plants, or slightly wider than the rootball for potted plants.
- Fork over the bottom of the trench to break up any compaction.
- If using mycorrhizal fungi, sprinkle the granules into the trench and onto the roots at planting time.
- Soak bare root plants in a bucket of water for an hour before planting. Water potted plants thoroughly.
- Place the first plant at one end of the trench. For bare root privet, spread the roots out naturally. The soil mark on the stem should sit at ground level.
- Backfill with the excavated soil, firming gently with your heel as you go. Do not bury the stems deeper than they were in the nursery.
- Work along the trench, planting at your chosen spacing. For a dense hedge, plant in a double staggered row.
- Water thoroughly after planting, even if rain is forecast.
- Mulch along the hedge line with 5 to 8 cm of bark or compost, keeping the mulch clear of the stems.
Privet hedge spacing and sizing: how many plants per metre
The two available bare root sizes, 40-60 cm and 60-90 cm, can both be planted in a single row for a conventional boundary hedge. The spacing table below shows how planting density affects the number of plants needed per metre. A double staggered row gives the hedge greater depth and can help it fill out sooner, although it requires considerably more plants and a wider prepared strip. The potted 2 to 3 litre row is included as general spacing guidance only; Garden Hedges does not list potted privet in its supplied range.
For a single row, space plants 30 to 40 cm apart. For a double row, plant 40 to 50 cm apart in each row, with the rows 30 to 40 cm apart and the plants staggered so they do not sit directly opposite each other. If you are planting larger pot-grown privet, check the spread of the plant and space so the branches will just touch at planting time.
| Plant size | Single row spacing | Double row spacing | Plants per metre (single row) |
|---|---|---|---|
| 40-60 cm bare root | 30 cm apart | 40 cm apart, 30 cm between rows | 3 to 4 |
| 60-90 cm bare root | 35 to 40 cm apart | 45 cm apart, 35 cm between rows | 2.5 to 3 |
| Potted 2 to 3 litre | 40 to 50 cm apart | 50 cm apart, 40 cm between rows | 2 to 2.5 |
Watering and feeding a privet hedge
Newly planted privet hedges need consistent moisture for the first growing season. Water deeply once or twice a week in dry weather, rather than little and often. A thorough soak encourages roots to grow down into the soil, making the hedge more drought-resistant later. In the second year, water only during prolonged dry spells.
Feeding is simple. In March, apply a general-purpose granular fertiliser, such as Growmore or blood, fish and bone, along the hedge line at the rate recommended on the packet. A second light feed in June can boost growth on poor soils. Mulching every spring with well-rotted compost or manure feeds the soil, conserves moisture and suppresses weeds. Keep mulch away from the stems to prevent rot.
- Water new hedges deeply once or twice a week in dry spells
- Feed in March with a balanced granular fertiliser
- Optional second feed in June on poor soils
- Mulch annually with compost or manure, 5 to 8 cm deep
When to prune a privet hedge: month-by-month trimming guide
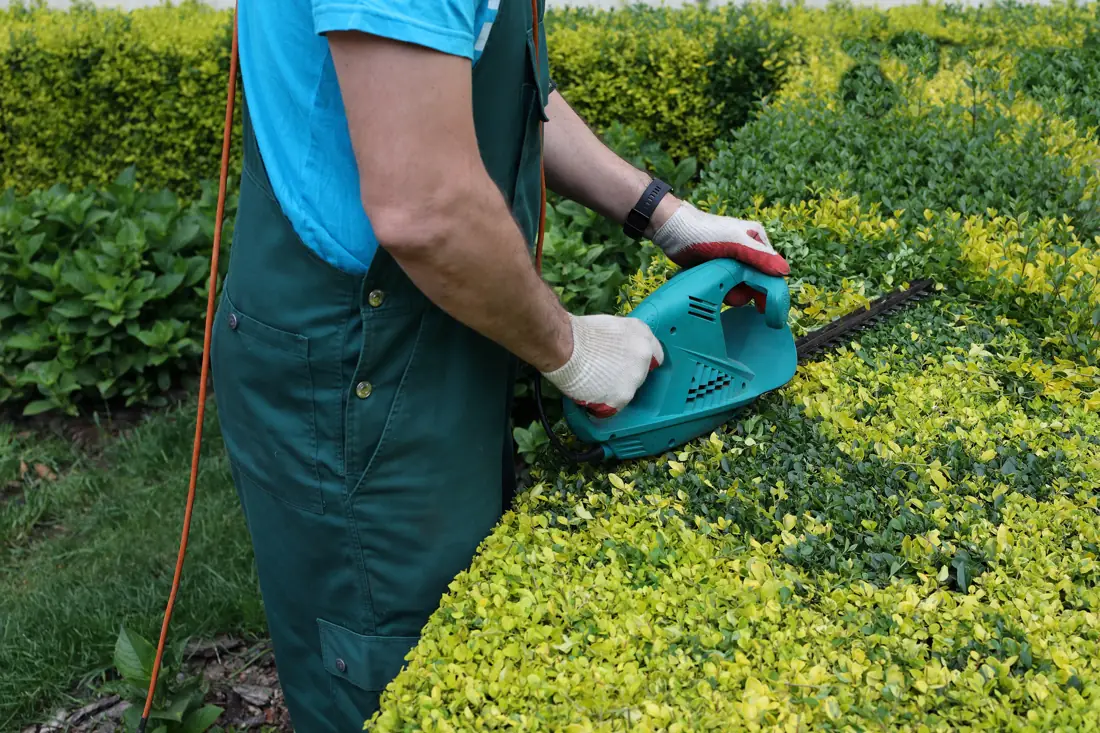
Privet responds to clipping by producing dense new growth, so regular trimming is the secret to a thick, formal hedge. Established formal privet hedges often need two or three light trims during the growing season, usually between May and August. After the first flush of growth, a cut in late May or June helps retain the hedge's shape and encourages branching. A second trim in July or early August may be enough for a tidy boundary. Where growth is especially vigorous, a further light trim can be considered towards the end of August, provided no active bird nests are present. Avoid heavy pruning late in the season, as fresh shoots may struggle to harden before frost. Always inspect the hedge for nesting birds before cutting; an active nest must be left undisturbed, regardless of the month.
For an informal privet hedge that is allowed to flower, trim once in late winter, before the birds start nesting, or just after flowering in summer. Wild privet grown as part of a native hedge can be cut in January or February, along with the rest of the mix.
Always check for nesting birds before you cut. Under the Wildlife and Countryside Act 1981, it is an offence to damage or destroy an active nest. The main nesting season runs from March to August, so if you see signs of nesting, delay trimming that section until the chicks have fledged.
| Month | Action |
|---|---|
| January | Cut back overgrown deciduous privet hedges if needed. Check for nests. |
| February | Finish any hard winter pruning of wild privet or mixed native hedges. |
| March | Light tidy of stray shoots if necessary. Main nesting season begins. |
| April | Do not trim. Check for nesting birds. |
| May | First trim of the season from mid to late May, once new growth is 10 to 15 cm long. |
| June | Trim if growth is strong. Good month for the first or second cut. |
| July | Second trim of the season. Keep hedges tight and neat. |
| August | Third and final trim early in the month. Do not cut after late August. |
| September | Emergency tidy only if essential. Avoid cutting after mid-September. |
| October to December | No trimming. Let the hedge harden off for winter. |
Common problems with privet hedges and how to fix them
Privet is tough, but a few problems can spoil its looks. The most common are honey fungus, privet wilt, leaf spot and nutrient deficiencies.
Honey fungus (Armillaria) is a serious soil-borne disease that can kill privet. You may see white fungal sheets under the bark at the base, black bootlace-like strands in the soil, and honey-coloured toadstools in autumn. There is no chemical cure. Remove and destroy affected plants, including as much root as possible, and do not replant with susceptible species in that spot.
Privet wilt is a fungal disease that causes leaves to turn yellow, wilt and drop, often on one branch first. Prune out affected stems, cutting into healthy wood, and disinfect tools between cuts. Improve air circulation by thinning dense hedges.
Leaf spot shows as small brown or purple spots on the leaves, sometimes with yellow halos. It is usually cosmetic and does not kill the hedge. Rake up and dispose of fallen leaves in autumn to reduce infection next year.
Yellowing leaves with green veins often indicates iron or manganese deficiency, common on chalky soils. Apply a liquid seaweed feed or a chelated iron tonic in spring. A mulch of well-rotted compost also helps.
- Honey fungus: remove affected plants; no chemical control
- Privet wilt: prune out affected branches, disinfect tools
- Leaf spot: rake up fallen leaves; usually cosmetic
- Yellow leaves with green veins: treat with seaweed feed or iron tonic
Privet safety and legal considerations
All parts of privet are mildly poisonous if eaten. The berries and leaves contain glycosides that can cause stomach upset, vomiting and diarrhoea in humans, dogs and cats. The berries are bitter, so serious poisoning is rare, but it is wise to site a privet hedge away from children’s play areas and to train dogs not to chew the twigs.
Boundary hedges can become a source of disagreement when branches spread into neighbouring gardens or obstruct public paths. In England and Wales, neighbours can generally cut back branches that extend over their property, provided they remain within the law and do not trespass or damage protected plants. The cut material remains the hedge owner's property and should be offered back, although the owner does not have to accept it. Hedge owners should also prevent growth from creating an obstruction or safety hazard on adjoining roads and pavements. Under Part 8 of the Anti-social Behaviour Act 2003, certain evergreen or semi-evergreen hedges over two metres high may be subject to a council high hedge complaint if they adversely affect a neighbour's reasonable enjoyment of their property. A privet hedge can be kept at a manageable height with regular cutting, making early maintenance easier than dealing with a long-neglected boundary.
The Wildlife and Countryside Act 1981 makes it an offence to intentionally damage or destroy an active bird’s nest. Always check a privet hedge carefully before trimming between March and August. If you find a nest, leave that section uncut until the young have fledged.
- Leaves and berries are mildly poisonous to people and pets
- Neighbours can trim overhanging branches back to the boundary
- Keep hedges from obstructing pavements and roads
- Check for nesting birds before trimming from March to August
Design ideas with privet hedges
Privet’s dense, fine-textured foliage makes it one of the best plants for formal hedging. A low privet hedge, kept at 60 to 90 cm, makes a classic parterre or knot garden outline, framing roses, lavender or box alternatives. For front gardens, a waist-high privet hedge gives a crisp boundary without blocking light to the house.
Taller privet hedges, clipped to 2 to 2.5 metres, create excellent privacy screens and can muffle traffic noise. Because privet tolerates shade, it works well along a north-facing boundary where many evergreens would struggle. For a softer look, mix wild privet into a native hedgerow with hawthorn, hazel and field maple. This gives flowers for pollinators, berries for birds and a more relaxed outline.
Golden privet (Ligustrum ovalifolium Aureum) is a variegated form with bright yellow leaf margins. It is less vigorous than green privet and does best in full sun, where the colour is strongest. Use it as a specimen shrub or a short run of hedging to light up a dark corner. It can be clipped just like green privet, but expect slower growth and a less dense finish in shade.
- Low formal hedges for parterres and front gardens
- Tall privacy screens for boundaries and noise reduction
- Mixed native hedgerows with wild privet for wildlife
- Golden privet as a bright accent in sunny spots
Buying privet hedge plants: bare root, potted and what to look for
Most privet hedging plants are sold as bare root plants between November and March. Bare root privet is lightweight, easy to handle and establishes quickly when planted during the dormant season. It is the most cost-effective way to plant a long hedge. Look for plants with a well-developed root system and several strong stems. On arrival, the roots should be moist and the stems free from damage or mould.
Garden Hedges currently lists privet hedging as bare root plants in 40-60 cm and 60-90 cm sizes, rather than potted specimens. Bare root plants are intended for planting during their dormant season, which makes autumn and winter the sensible time to plan a new run. If you are replacing a few missing plants, measure the existing hedge and consider how the new plants will fit beneath its established branches. Smaller replacements may take time to reach the surrounding height, particularly if neighbouring plants compete for light and moisture. Potted privet can be found elsewhere in the nursery trade for planting outside the bare root season, but it is not part of the stated Garden Hedges range.
When you buy privet hedge plants, think about the finished height you want and how quickly you need the screen. Smaller bare root plants, 40 to 60 cm tall, catch up fast and are easier to plant in large numbers. Taller bare root plants, 60 to 90 cm, give a head start. For a new hedge, always buy from a specialist nursery that supplies fresh, dormant bare root plants in the winter planting window.
- Bare root privet: November to March, economical, easy to plant
- Potted privet: year-round, good for gaps or instant effect
- Check roots are moist and stems are undamaged on arrival
- Choose 40-60 cm for economy, 60-90 cm for a faster screen
Common questions
What are the negatives of privet hedge?
Privet is semi-evergreen and can lose its leaves in a hard winter, leaving the hedge bare until spring. It needs trimming two or three times a year to stay neat, and its shallow roots can dry out the soil around it. The berries and leaves are mildly poisonous, so it is not ideal next to play areas or where dogs chew plants.
Is privet Russian or Ukrainian?
The word privet as a hedge plant is not Russian or Ukrainian. The plant name comes from the Old English privet, meaning private, because it was used for private enclosures. The Russian word privet (привет) is a greeting meaning hello, and is unrelated to the plant.
Is privet a good hedge?
Yes, privet is a very good hedge for UK gardens. It grows quickly, tolerates most soils and partial shade, and clips into a dense, formal shape. It is one of the most economical hedging plants, especially when bought as bare root plants.
What does privet mean?
In gardening, privet is the common name for shrubs in the Ligustrum genus, widely used for hedging. The name is thought to come from the Old English word for private, because privet hedges were traditionally planted to create private spaces.
When to prune privet hedge?
Privet hedges should be trimmed two or three times between May and August. The first cut is usually in late May or early June, the second in July, and a final light trim in early August. Avoid cutting after September, as soft new growth can be damaged by frost.
When to trim privet hedge?
Trim a privet hedge from late May to early August. Aim for two or three cuts in that period to keep the hedge dense and neat. Always check for nesting birds before trimming, especially between March and August.
When to cut privet hedge?
Cut your privet hedge during the main growing season, from late May to early August. A hard cut back of an overgrown hedge is best done in late winter, before the birds start nesting, but be aware that privet may look bare for a few months afterwards.
When to cut back privet hedge?
If your privet hedge has become too tall or wide, cut it back hard in late winter, ideally February. It will regrow vigorously from old wood. For routine shaping, stick to the May to August trimming window.
When to cut privet hedge UK?
For routine privet hedge trimming in the UK, late May to early August is a useful period because the hedge is actively growing and can respond to light cutting. However, these months overlap with the main bird nesting season, so trimming must only proceed after checking carefully for active nests. If birds are nesting, leave the affected growth untouched until the nest is no longer in use. For a neglected hedge that needs hard renovation, late winter, often February, is generally a better time, provided the hedge is free of active nests and severe frost is not expected.